Understanding Vapor Barriers
What is a Vapor Barrier?
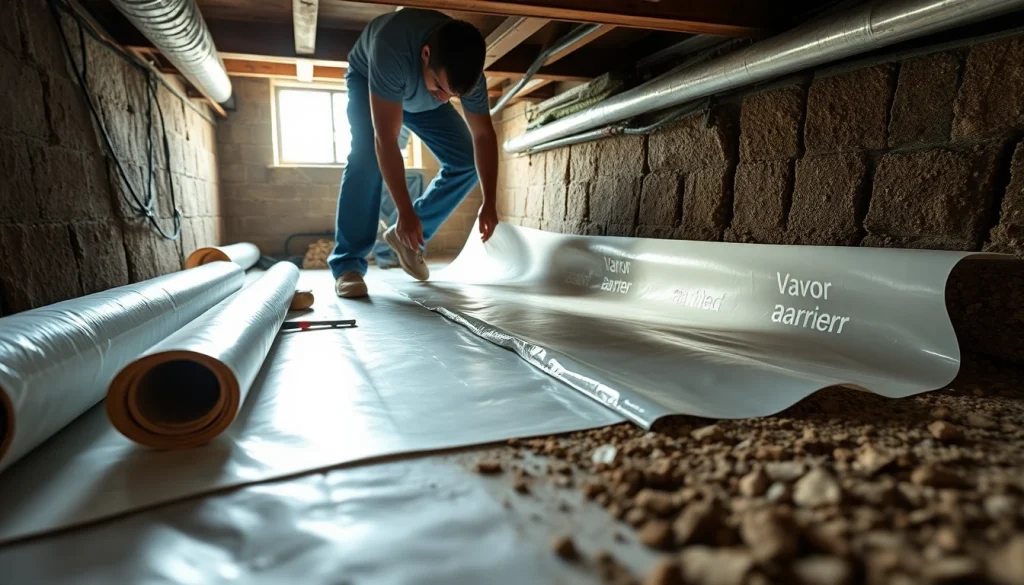
A vapor barrier is a material used to prevent moisture from penetrating a space. In the context of crawlspaces, vapor barriers are usually plastic sheeting that covers the ground and walls to slow the movement of water vapor from the soil into the air and, ultimately, into your home. This is critical for maintaining structural integrity and promoting healthier living conditions within the home.
Importance of Vapor Barrier Installation
Installing a vapor barrier is crucial for several reasons. Firstly, homes without proper vapor barriers are at a higher risk for moisture-related issues such as mold, wood rot, and structural damage. These problems can lead to expensive repairs and health hazards due to poor air quality. Moreover, proper Vapor Barrier Installation improves energy efficiency, reducing heating and cooling costs by maintaining consistent temperatures in your living space. Ultimately, the installation of a vapor barrier is a proactive measure that safeguards your home and enhances its longevity.
Common Materials Used for Vapor Barriers
Vapor barriers are typically made from materials such as polyethylene plastic, which is durable and resistant to moisture. The thickness of these materials usually ranges between 6 to 20 mils. In addition to polyethylene, other materials can include reinforced plastic sheeting and specialty membranes designed for specific environmental conditions. Understanding the materials can help homeowners choose the best option tailored to their needs.
Preparing for Vapor Barrier Installation
Assessing Your Crawlspace Conditions
Before installation, it’s important to assess the current conditions of your crawlspace. Check for existing moisture issues, signs of pests, and overall cleanliness. You need to ensure that the ground is relatively dry and free from debris, as a moist or contaminated ground will undermine the effectiveness of the vapor barrier. Additionally, ensuring good drainage around your foundation is vital for preventing water from pooling in the crawlspace.
Tools and Materials Needed
The following tools and materials are typically needed for vapor barrier installation: polyethylene sheeting, utility knife, measuring tape, construction adhesive, waterproof tape, staple gun, and possibly a moisture meter. Gather these supplies ahead of time for a smooth installation process.
Steps to Prepare the Area
Preparing the area involves several critical steps. Begin by cleaning the crawlspace, removing old insulation, debris, and any obstacles that could interfere with installation. Next, ensure that the ground is graded properly to direct any water away from the foundation. If necessary, consider installing a sump pump for additional moisture control.
Steps to Install a Vapor Barrier
Detailed Installation Process
The installation of a vapor barrier involves several steps. Firstly, measure the dimensions of your crawlspace to cut the plastic sheeting accordingly. Lay the vapor barrier over the ground, making sure it overlaps at the seams. Use waterproof tape or construction adhesive to seal the seams effectively. Ensure that the barrier goes up the walls of the crawlspace at least 12 inches and is secured in place with a staple gun. Finally, make sure that no holes are present, as they can significantly compromise the barrier’s effectiveness.
Common Mistakes to Avoid
One of the most common mistakes is improper sealing at the seams, which can allow moisture to penetrate the crawlspace. Another issue is failing to overlap the seams adequately. Additionally, neglecting to account for ventilation can lead to humidity issues since vapor barriers work best in tandem with proper air circulation.
Ensuring Proper Sealing
Proper sealing is vital to the effectiveness of a vapor barrier. This can be achieved by using heavy-duty waterproof tape at all seams and corners. Edges should be tucked beneath any insulation to prevent moisture intrusion. Inspecting the installation periodically can help identify any potential weaknesses or failures in seals that may occur over time.
Maintenance and Inspection
Routine Checks for Effectiveness
Once a vapor barrier is installed, routine inspections should be conducted every few months, especially after significant weather events. Look for signs of moisture accumulation, mold growth, or any wear or tear in the barrier itself. Regular maintenance checks will ensure that your barrier continues to perform effectively.
Signs that Your Vapor Barrier Needs Repair
Common signs that your vapor barrier may need repairs include visible moisture on the surface of the barrier, mold growth, or an increase in musty odors in your crawlspace. If you notice any of these issues, it’s crucial to address them promptly to prevent further damage.
Best Practices for Long-lasting Results
To achieve long-lasting results from your vapor barrier installation, follow best practices such as routine maintenance, ensuring proper drainage around your home, and monitoring humidity levels in the crawlspace. Additionally, consider pairing the vapor barrier with other moisture control measures like dehumidifiers or proper grading to ensure optimal protection against moisture infiltration.
FAQs About Vapor Barrier Installation
What is the ideal thickness for a vapor barrier?
The ideal thickness for a vapor barrier typically falls between 6 to 20 mils. Thicker materials offer better durability and protection against moisture penetration.
Can I install a vapor barrier myself?
Yes, vapor barriers can be installed by homeowners. However, it requires careful planning and execution to avoid common mistakes. Following clear instructions can lead to successful installation.
What are the risks of not installing a vapor barrier?
Not installing a vapor barrier can lead to significant moisture issues, including mold growth, wood rot, and structural damage, which can result in costly repairs and health concerns.
How does a vapor barrier improve air quality?
A vapor barrier helps improve indoor air quality by reducing moisture levels that contribute to mold and mildew growth, leading to a healthier living environment and reducing allergens.
How long does a vapor barrier last?
With proper installation and maintenance, a vapor barrier can last for many years, often 15 years or more, but routine inspections are essential to ensure its effectiveness over time.